Our Heat Sealer maintenance guide discusses the most common considerations for keeping your machine in good, working order.
Heat sealers are invaluable tools in any commercial or medical setting. They provide a quick and easy way to seal bags or packages shut, ensuring contents stay sterile and protected. But like any machine, heat sealers can develop problems over time. Here is a guide to some common heat sealer problems and how to fix them
What Are The Most Common Reasons For A Heat Sealer To Break?
The two most common reasons for a heat sealer, either impulse or constant to break are the element wire breaking and the PTFE “non-stick” cover being worn through.
Let’s look at both of these issues below, and how you might repair them quickly and conveniently.
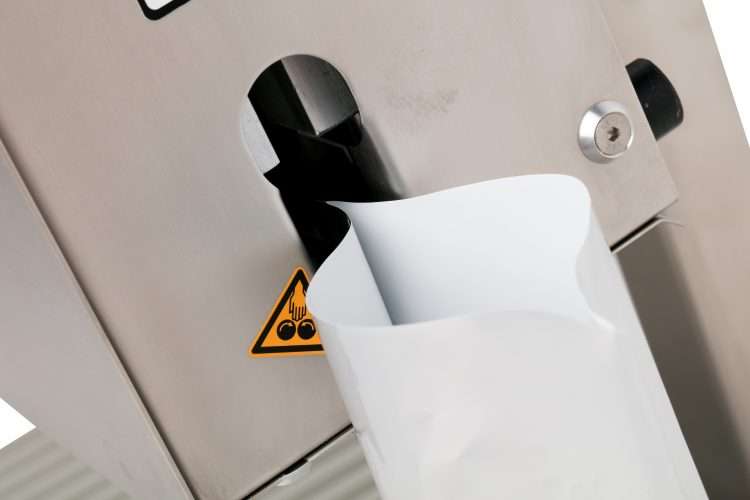
Please note, that before you start to investigate your sealer, make sure it is turned off, unplugged and allowed to completely cool.
PTFE Cover Wearing Through
When your PTFE cover begins to wear, it will discolour. Most PTFE covers are tan and will continue to get darker as it becomes more worn. This is due to the element wire beginning to burn through the cover and, if left untreated, will eventually short out your sealer.
You need to make sure that you replace the cover before this happens. Depending on the kind of heat sealer, you can probably expect to get somewhere between 4,000 and 5,000 seals before you need to replace the cover.
If you continue to use a heat sealer machine with a damaged or faulty PTFE cover, then it will not allow the material to seal properly. It could also result in the sealing material you’re using stick to the damaged area, and considerably shorten the lifespan of your machine.
Element Wire Breaking
If your impulse heat sealer isn’t working at all, then it is extremely likely that there’s a problem with your heating element wire. This is the wire which actually heats up, causing the machine to seal.
If you suspect there’s an issue with the element wire, then follow these simple steps to replace it:
- Check The Element – Remove the PTFE fabric (Teflon) and check the condition of the element wire itself. The wire must not be broken and run cleanly from point to point.
- Check The Tape Strip – If the wire is broken, check the tape strip underneath the wire. You’ll likely find a hole there, which is causing the unit to short out. It’s also possible that, instead of tape, there’s a plastic strip under the wire.
- Replace The Tape or Plastic Strip – Replace the damaged strip with fresh tape or replace the plastic strip with the manufacturer’s alternative. Ensure the entire path, from wire-post to wire-post, is completely covered.
- Replace The Wire – The heating wire element is simple to replace on most machines. You should ensure the wire itself is fully connected to both posts and isn’t overly loose.
All of these elements, including the cover, tape and the heating wire itself, are all consumable parts which are expected to go over time. The frequency of wear depends on the kinds of materials you are sealing and the kinds of stresses you place your machine under.
Typically, the higher heat you use to seal, the shorter the lifespan of these consumable elements. It’s a good reason not to use too high a heat setting, in addition to the higher running costs and danger risks associated with overheating any element.
Checking Your Heat Sealer Timer
If there’s not an issue with your consumable elements, then the next step is to check your machine’s timer. A heat sealer timer controls the seal-cycle duration and prevents you from overheating your material.
Timers for heat sealers have an indicator list which signals whenever the timer is powered. If the light doesn’t come on while attempting to seal, then your timer is probably damaged.
Replacing the timer is a very simple process, and normally only takes a couple of minutes. Changing the timer is different for every machine, so you’re better off consulting your manufacturer’s guide.
Check Your Heat Sealer’s Microswitch
If you’re still having issues with your machine after looking into, or potentially replacing, the timer, then you need to check on the Microswitch. Your heat sealer’s microswitch is a small switch which completes the electrical circuit, allowing the heat-sealing cycle to begin.
If the microswitch is working correctly, you should be able to hear a small click whenever the switch’s contacts are opened or closed. Again, this can depend on the model in question, but most are extremely easy to replace.
Other Common Heat Sealer Maintenance Problems
Even the most reliable heat sealers will sometimes develop problems. In most cases, these issues are extremely easy to resolve, and are simply down to overuse or a lack of long-term maintenance.
Below are some of the most common heat sealer issues that you might encounter, and some simple tips on how to resolve them.
Heat Sealer Won’t Turn On
This is usually caused by a problem with the power supply or switch. First, check that the power cord is plugged in properly and that the outlet is working. If everything looks fine there, try flipping the switch on and off a few times. If that doesn’t work, you may need to replace the switch.
Heat Sealer Not Getting Hot Enough
Check the power cord for fraying or other damage. If it is damaged, replace it. If not, make sure the machine is plugged into an outlet that is receiving power. Also check the heating element to see if it is burned out. If so, replaced it.
If the sealer still isn’t getting hot enough, there could be a problem with the temperature control switch. Test it with a multimeter to see if it is working properly. If not, replace it.
Heat Sealer Not Sealing Properly
Check the sealing wire and element to see if they are worn down or damaged in any way. If so, replace them. Make sure the area around the sealing element is clean and free of debris. If not, clean it.
It is also possible that the heating element isn’t getting hot enough. See the section above on how to fix this problem.
Heat Sealer Maintenance Tips
Keeping your heat sealer in good working condition is important for maintaining a consistent, high-quality seal on your products. Here are some simple heat sealer maintenance tips to keep your machine performing well
- Avoid using the heat sealer on dirty or contaminated surfaces. This can cause the sealing element to become damaged or clogged.
- If you must use the heat sealer on a dirty surface, clean the sealing element after each use with a soft cloth dampened with alcohol.
- Always store the heat sealer in a cool, dry place when not in use.
- Inspect the sealing element regularly for any damage or wear and replace it if necessary.
- Keep the heat sealer clean and free of any dust or debris.
By following these simple tips, you can keep your heat sealer in good working condition and avoid any issues with sealing quality.
For Industry-Leading Heat Sealer Machinery, Don’t Hesitate to Shop Valdamark’s Diverse Range Today
Here at Valdamark, we are proud to offer industry-leading, reliable heat sealers for the commercial, medical and manufacturing industries. Our high-powered heat sealers are available in a wide range of styles, including impulse heat sealers, continuous heat sealers and more. For more information and FAQ’s on the wide range of heat sealer machines we can provide take a look at out knowledge base or don’t hesitate to get in touch today.